> ## Documentation Index
> Fetch the complete documentation index at: https://docs.messagedesk.com/llms.txt
> Use this file to discover all available pages before exploring further.
# Templates and Personalization Tags
> Build and reuse SMS templates in MessageDesk with personalization tags like first name, custom fields, and dates so every text feels written for one person.
# Save time and personalize messages with pre-saved templates and personalized tags
Templates keep your wording consistent and fast. Personalization tags pull in contact and workspace details automatically. Together, you get speed and personalized messages at scale.
## Why you should use templates and tags
* **Save time:** Stop re-typing common messages. Apply a template in one click.
* **Keep messaging consistent:** Standardize language across your entire team.
* **Personalize at scale:** Use tags to insert names, emails, phone numbers, and more.
* **Reduce errors:** Pre-approved text means fewer typos and missed details.
## What are message templates?
Templates are reusable messages you can apply anywhere you compose a text in MessageDesk.\
They can include plain text, **emoji**, [**media (MMS)**](/messaging/media), and **personalization tags**.
## What are personalization tags?
Tags are placeholders, like `{{ ContactFirstName }}`, that auto-fill with real contact info or other saved information at send time. You can use them in templates **and** one-off messages to personalize every text message.
## Apply, create, and edit message templates
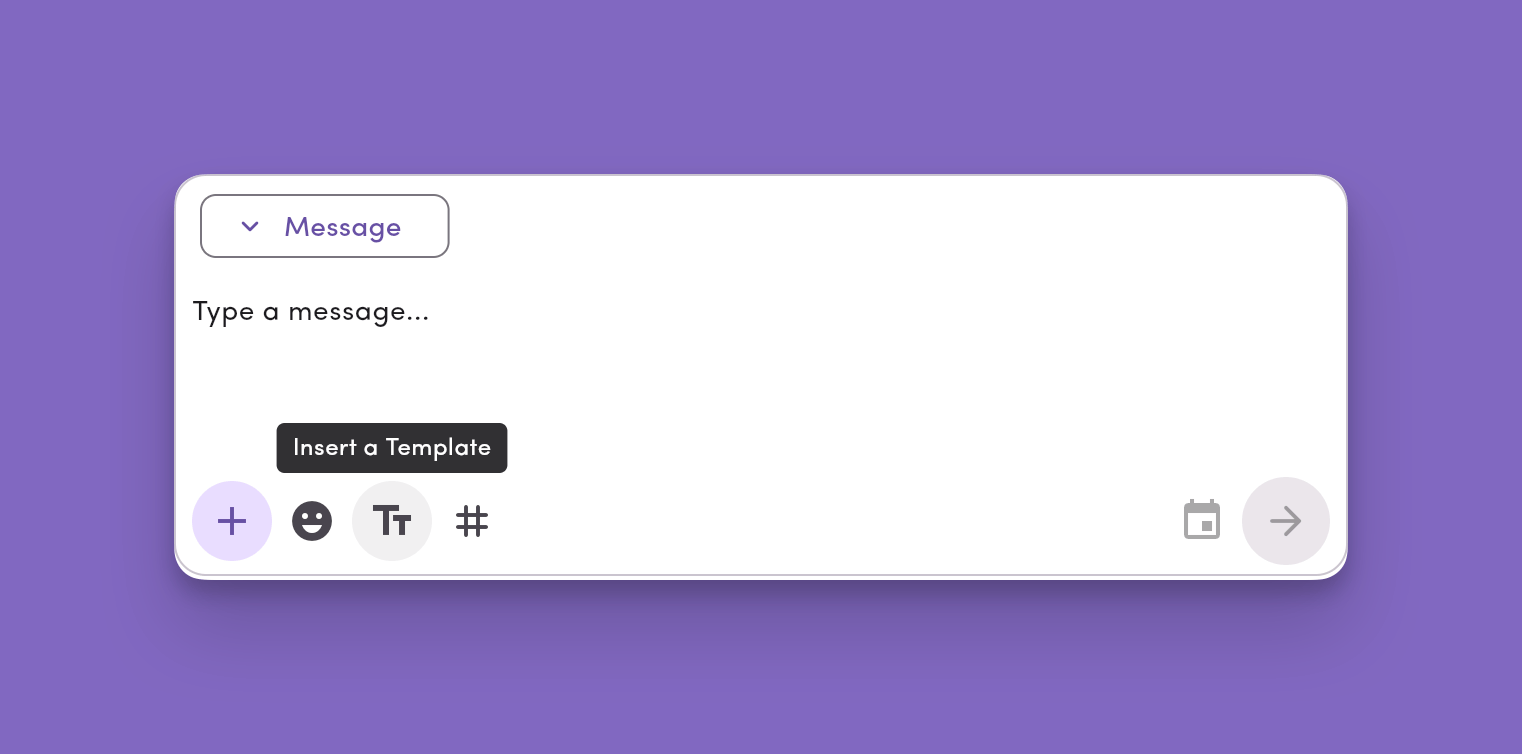
You can work with templates from any message compose box.
### Apply a template
1. Click the **TT** icon.
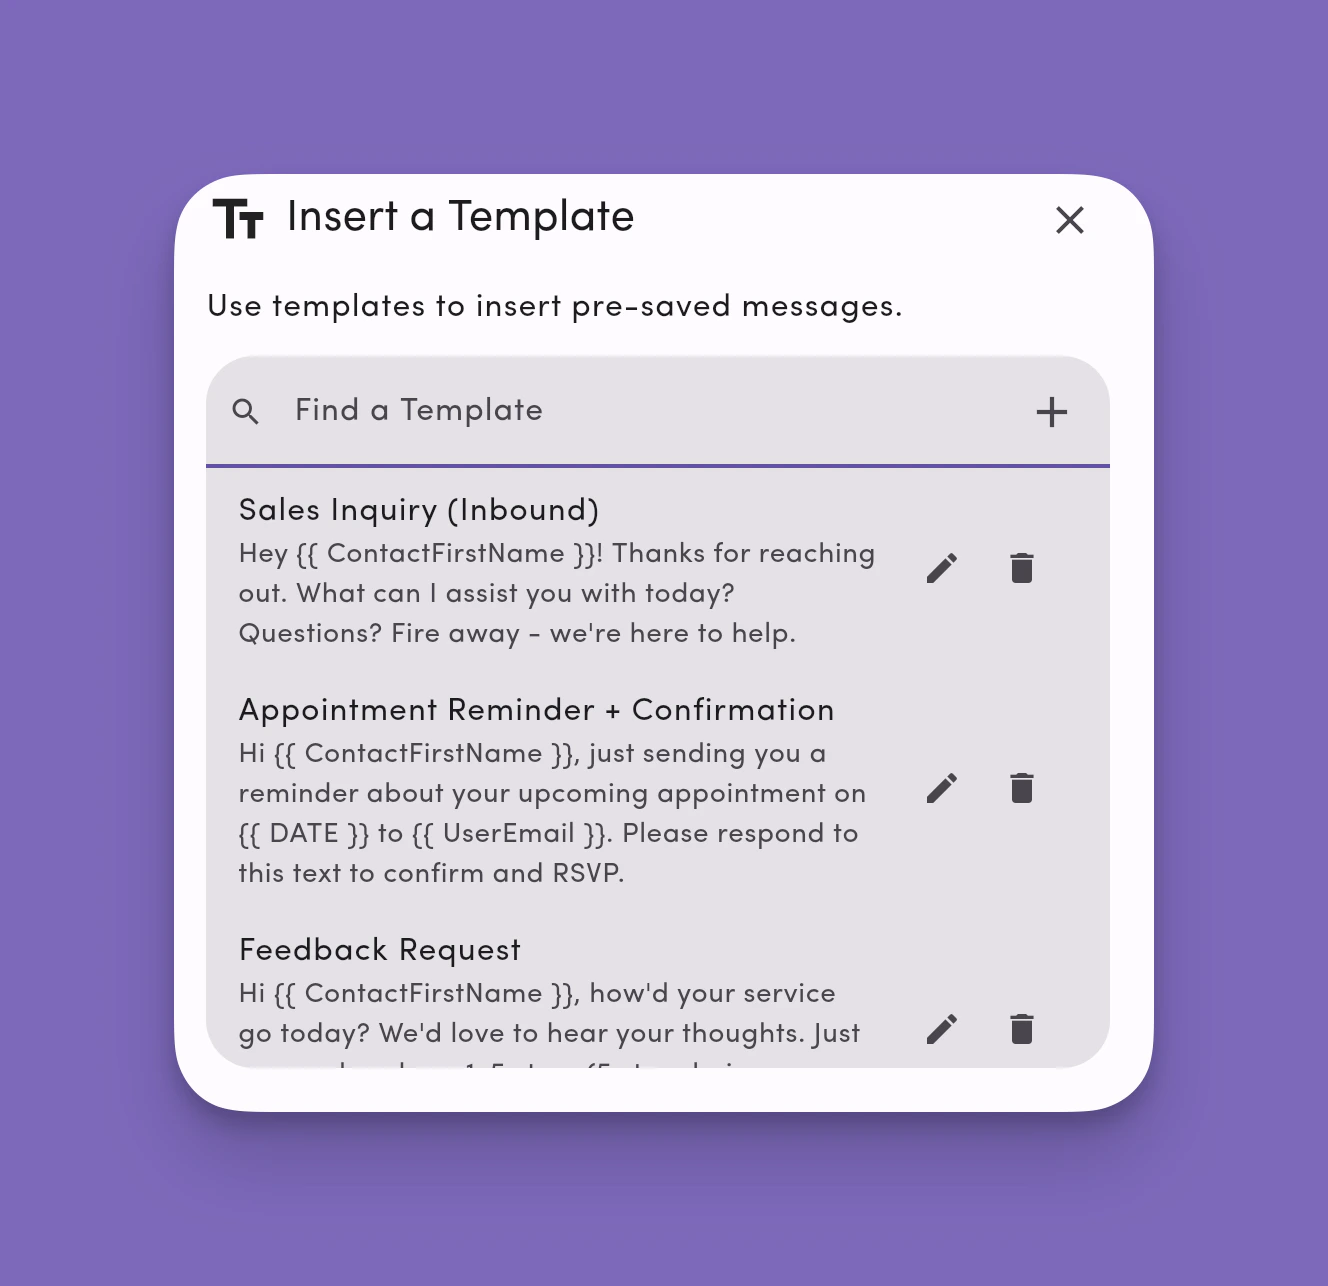
2. Search for or select a template. The picker shows each template's **name** and **description** for quick scanning.
3. (Optional) Click the **preview** button on a template to see its full contents before applying.
4. The template fills your message field. You can still edit before sending.
Templates in the picker are sorted **alphabetically (A–Z)** by name.
 ### Create a new template
1. Click the **TT** icon → **+ Create Template**.
2. **Name** your template clearly (so teammates can find it later).
3. (Optional) Add a short **description**. This appears alongside the name in the template picker to help teammates pick the right one.
4. **Type your message** content.
5. Optional: **Add media**, **emoji**, and **personalization tags**.
6. Click **Save**.
### Edit an existing template
1. Click the **TT** icon.
2. Hover a template and click the **pencil (edit)** icon.
3. Update the **name**, **description**, and/or **content**.
4. Click **Save**.
**Mobile:** You can also create, edit, and delete templates from the MessageDesk mobile app.
### Delete a template
1. Click the **TT** icon.
2. Hover a template and click the **trash (delete)** icon.
3. Confirm deletion.
**Note:** Deleting a template removes it for all users in your workspace. This action can't be undone.
**Tip:** Keep template names short and specific (e.g., “Appt reminder – 24h,” “Invoice past due – 7d”). That makes searching faster and prevents accidental misuse.
### Create a new template
1. Click the **TT** icon → **+ Create Template**.
2. **Name** your template clearly (so teammates can find it later).
3. (Optional) Add a short **description**. This appears alongside the name in the template picker to help teammates pick the right one.
4. **Type your message** content.
5. Optional: **Add media**, **emoji**, and **personalization tags**.
6. Click **Save**.
### Edit an existing template
1. Click the **TT** icon.
2. Hover a template and click the **pencil (edit)** icon.
3. Update the **name**, **description**, and/or **content**.
4. Click **Save**.
**Mobile:** You can also create, edit, and delete templates from the MessageDesk mobile app.
### Delete a template
1. Click the **TT** icon.
2. Hover a template and click the **trash (delete)** icon.
3. Confirm deletion.
**Note:** Deleting a template removes it for all users in your workspace. This action can't be undone.
**Tip:** Keep template names short and specific (e.g., “Appt reminder – 24h,” “Invoice past due – 7d”). That makes searching faster and prevents accidental misuse.
 ***
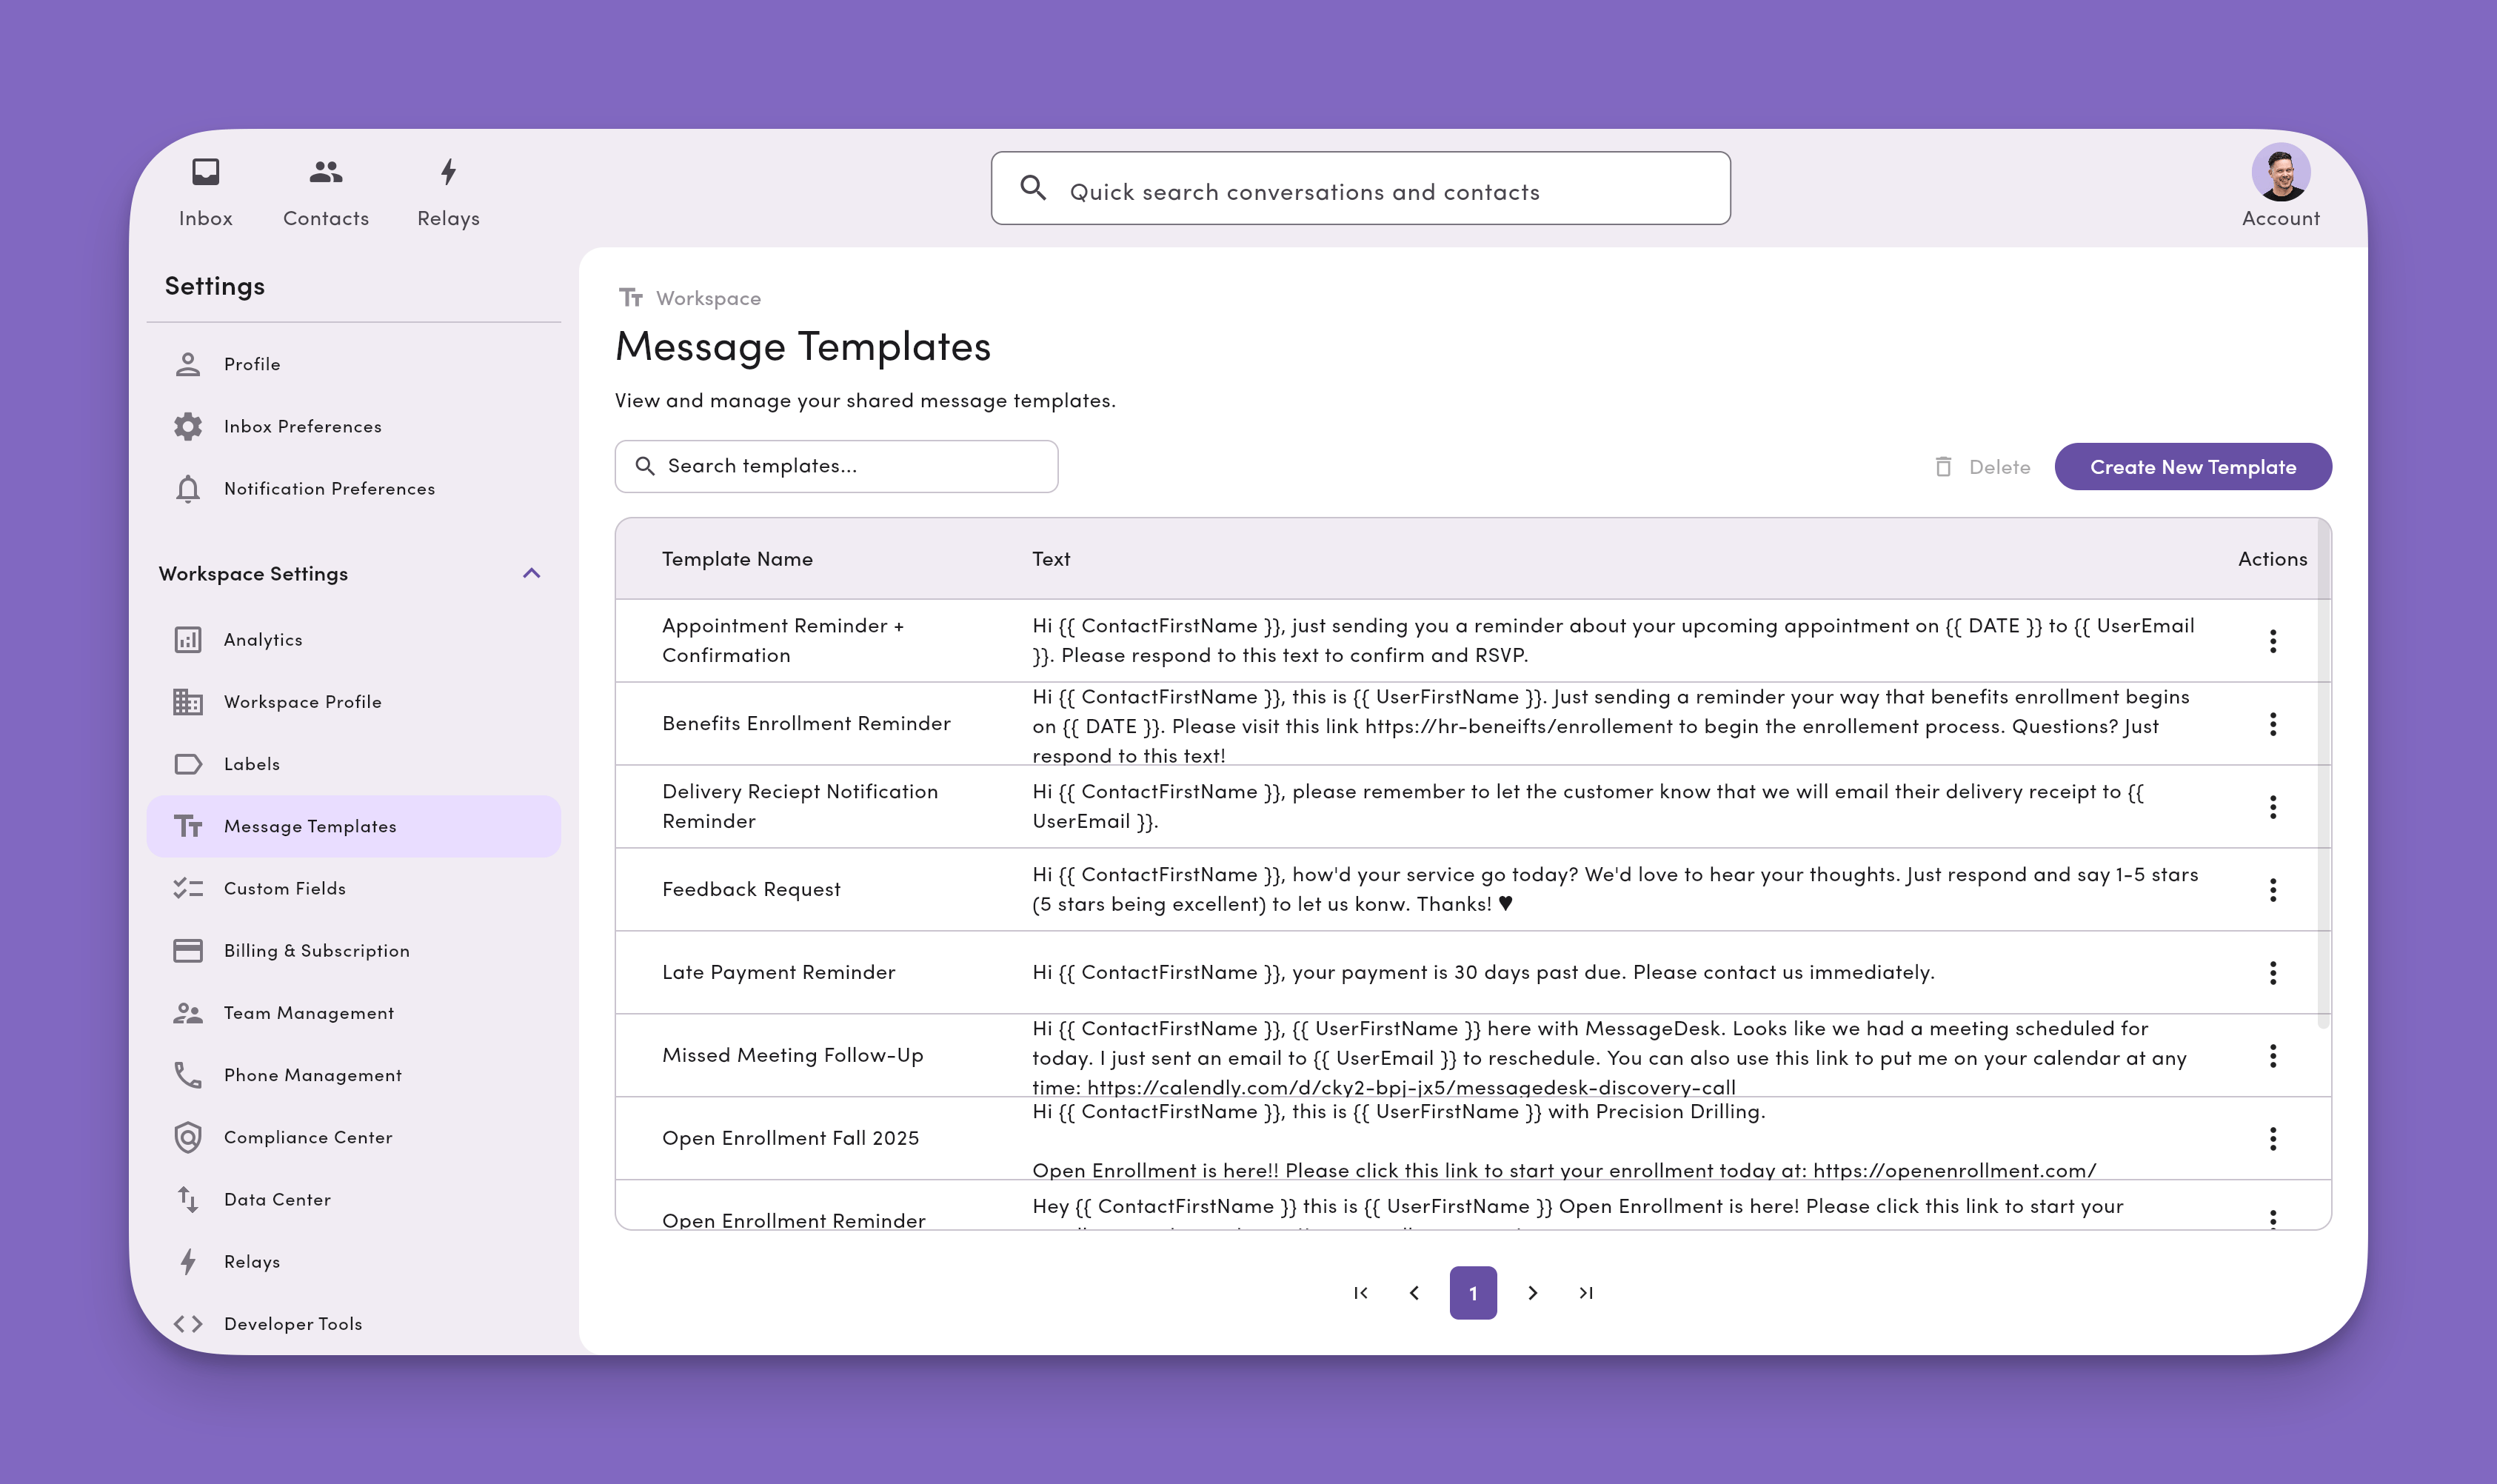
## Organize your message templates (Workspace Settings)
Admins and managers can manage all templates from Settings.
1. Go to **Account → Settings**.
2. Under **Workspace Settings**, choose **Inbox Settings → Templates**.
3. **Search**, **create**, or **edit** templates from this tab.
> **Best practice:** Use a naming system (Prefix: Purpose – Timing). Example:
>
> * **Billing:** Invoice paid – receipt
> * **Scheduling:** Appt reminder – 24h
> * **Onboarding:** Welcome – docs request
***
## Organize your message templates (Workspace Settings)
Admins and managers can manage all templates from Settings.
1. Go to **Account → Settings**.
2. Under **Workspace Settings**, choose **Inbox Settings → Templates**.
3. **Search**, **create**, or **edit** templates from this tab.
> **Best practice:** Use a naming system (Prefix: Purpose – Timing). Example:
>
> * **Billing:** Invoice paid – receipt
> * **Scheduling:** Appt reminder – 24h
> * **Onboarding:** Welcome – docs request
 ***
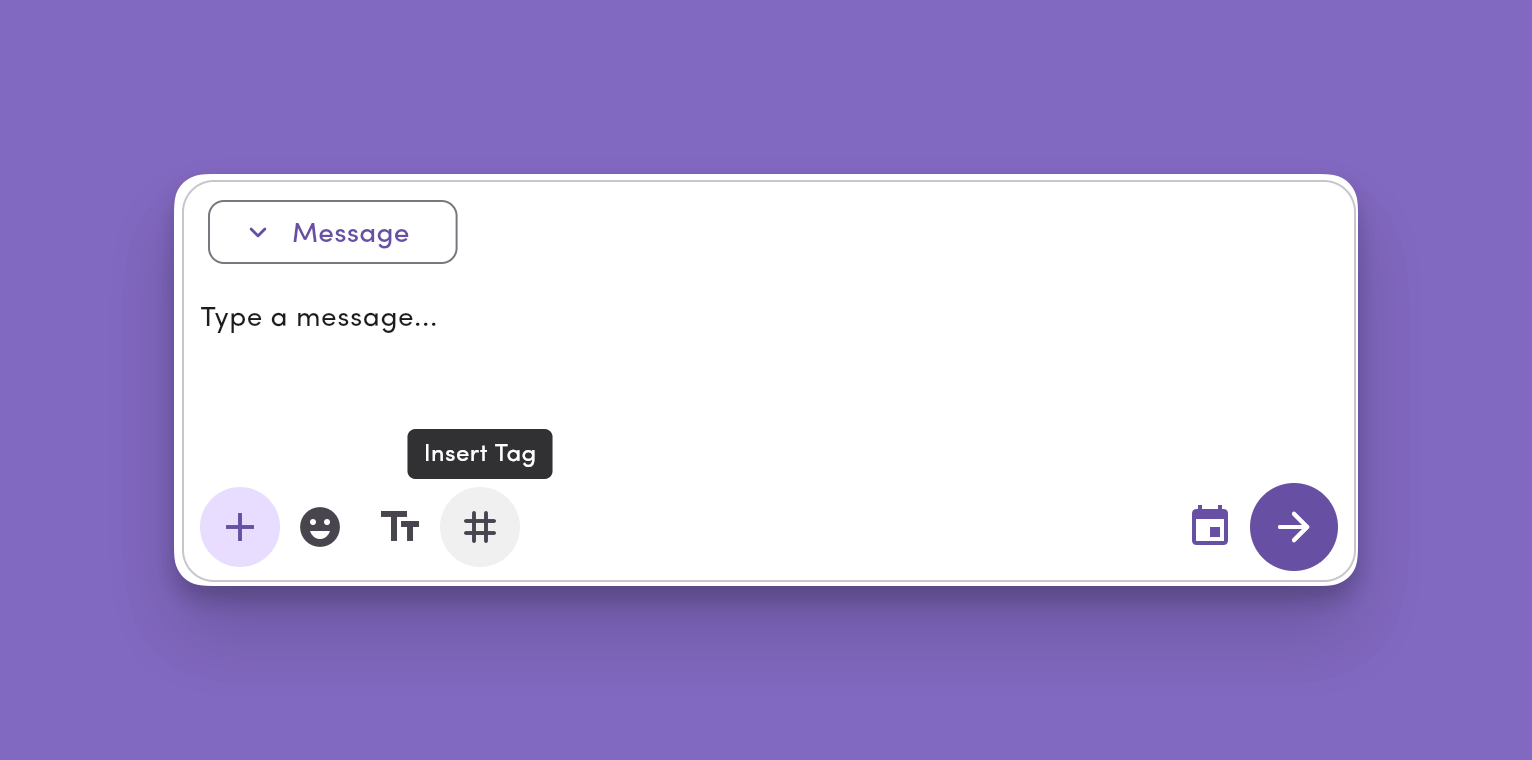
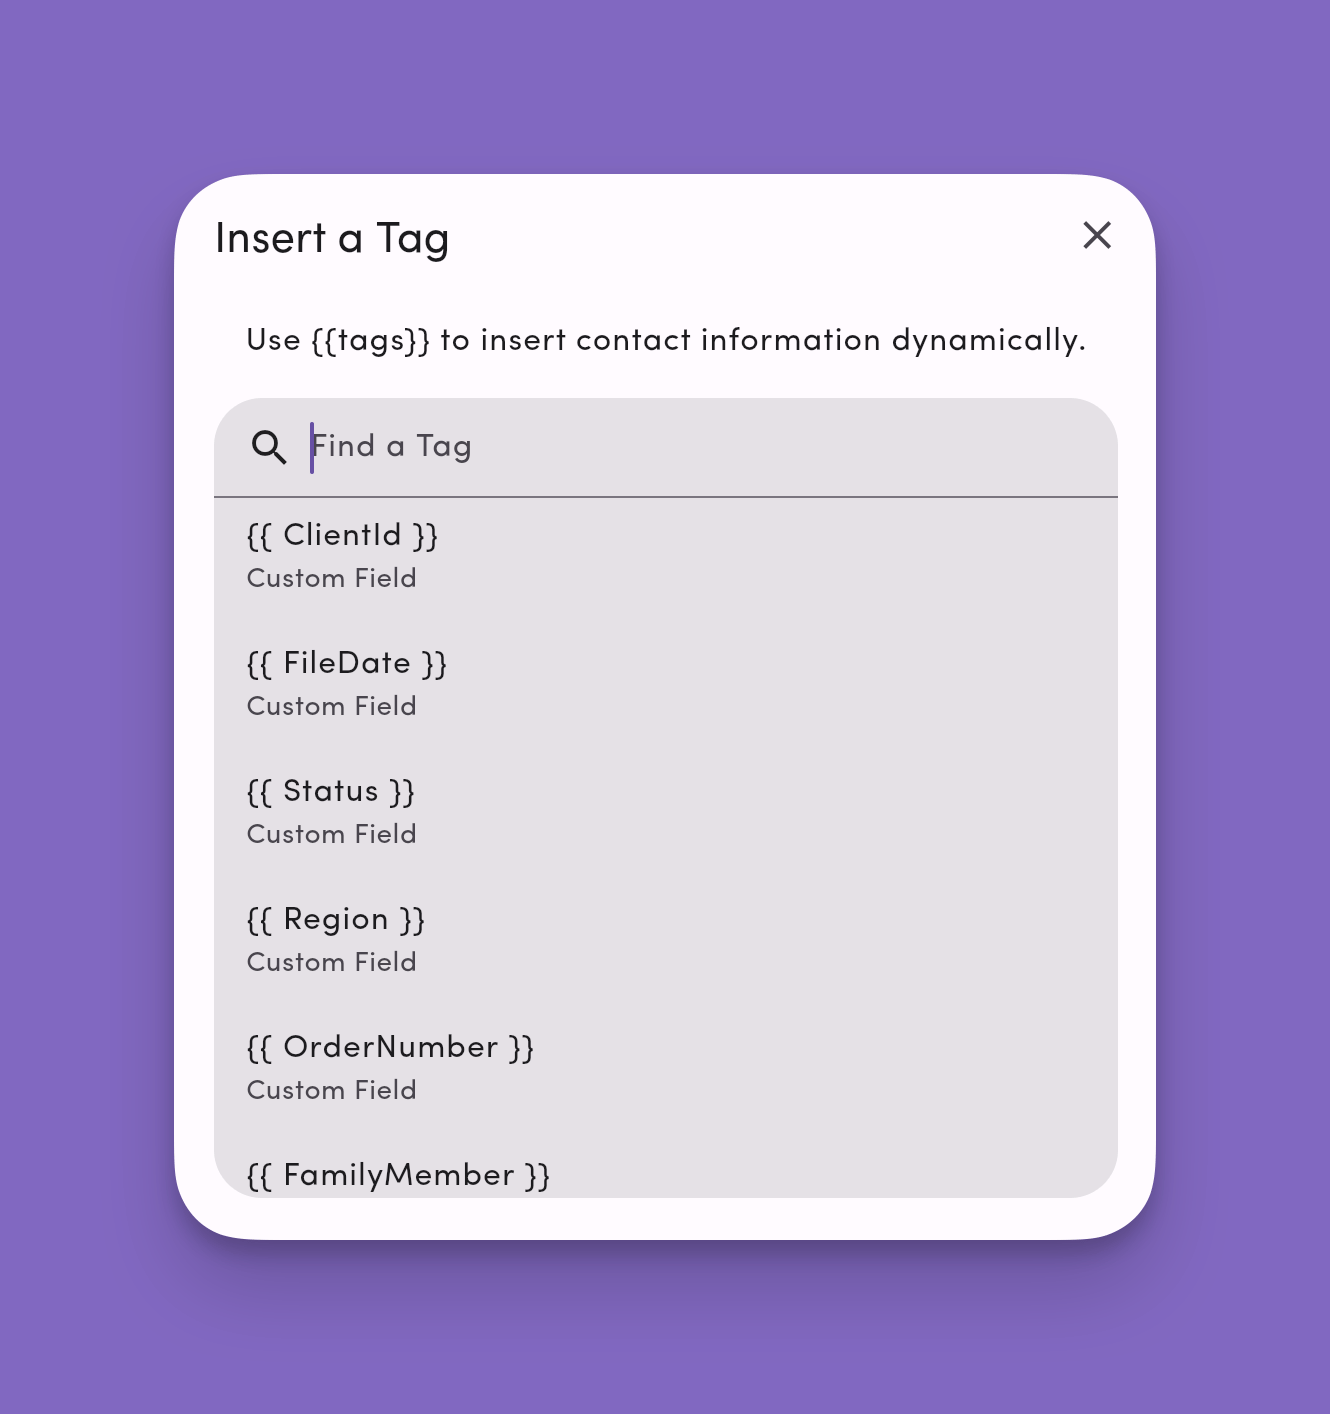
## How to insert a personalization tag
You can insert tags in any message, template or one-off.
1. Click the **#** icon in the message compose box.
2. Search for or select a **Tag**.
3. (Recommended) **Set a fallback** value so your message still reads well if data is missing.
4. Continue composing, then **Send** or **Schedule**.
***
## How to insert a personalization tag
You can insert tags in any message, template or one-off.
1. Click the **#** icon in the message compose box.
2. Search for or select a **Tag**.
3. (Recommended) **Set a fallback** value so your message still reads well if data is missing.
4. Continue composing, then **Send** or **Schedule**.
 ### Available tags
**Contact**
* `{{ ContactEmail }}` – contact’s email address
* `{{ ContactFirstName }}` – contact’s first name
* `{{ ContactLastName }}` – contact’s last name
* `{{ ContactPhone }}` – contact’s phone number
**Your user profile**
* `{{ UserEmail }}` – your MessageDesk user email
* `{{ UserFirstName }}` – your first name
* `{{ UserLastName }}` – your last name
* `{{ UserPhone }}` – your personal phone number saved in your user profile
**Workspace**
* `{{ WorkspaceName }}` – your MessageDesk workspace name
* `{{ WorkspaceEmail }}` – your workspace’s primary email
* `{{ WorkspacePhone }}` – your workspace’s primary phone
**Custom fields**
Every [custom field](/settings/workspace-settings/custom-fields) on a contact is also available as a personalization tag (for example, `{{ Region }}`, `{{ AccountType }}`, `{{ RenewalMonth }}`). Custom field tags show up in the `#` menu alongside the built-in tags.
* Tags update automatically when you add, rename, or delete a custom field in **Workspace Settings → Custom Fields**.
* Set a [fallback](#set-a-tag-fallback-important) so the message still reads cleanly when a contact is missing a value.
**Note:** Tags resolve at send time. In broadcasts, each recipient gets their own personalized version.
***
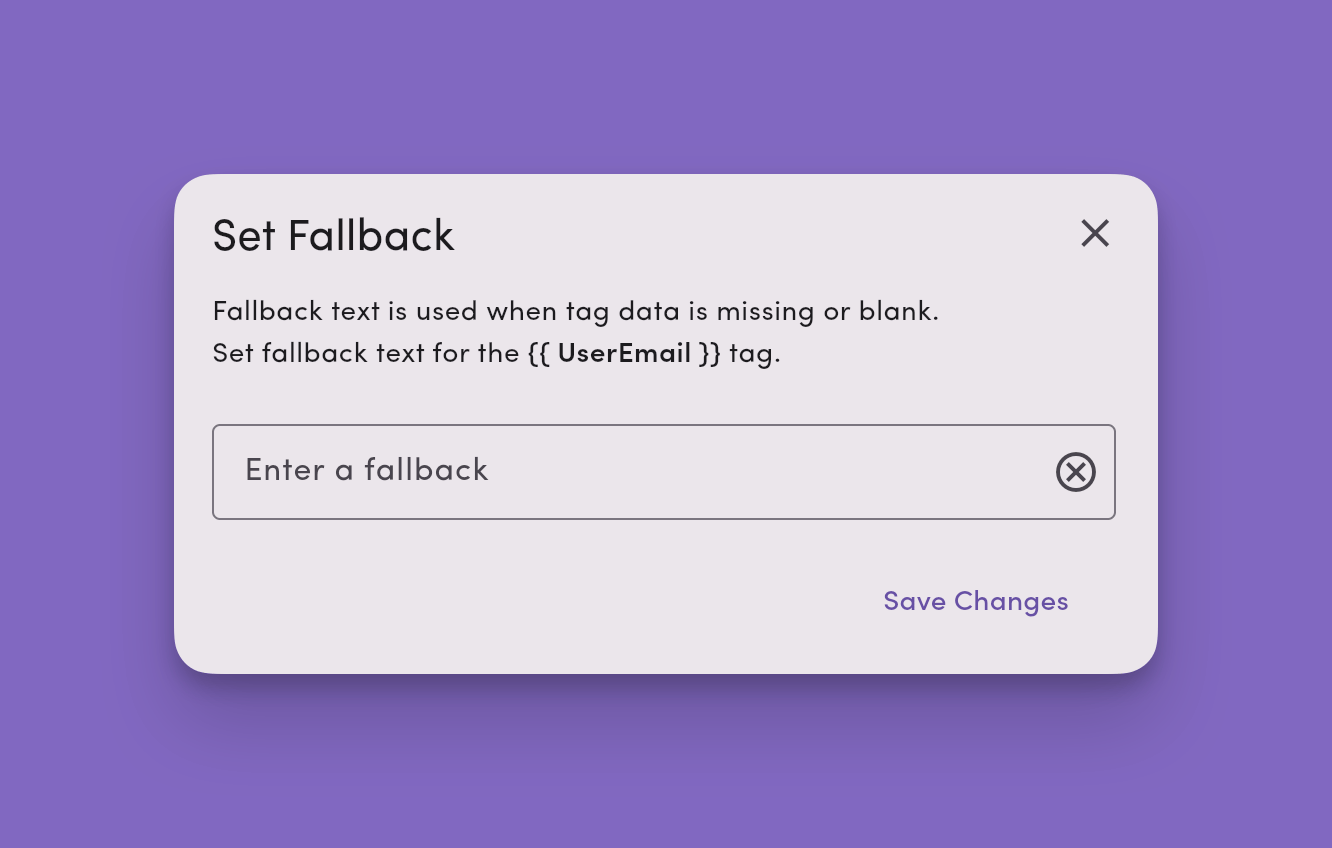
## Set a tag fallback (important)
A fallback is the default text used **when a tag has no data**. For example, when you text a raw phone number that isn't saved as a contact yet, or when some contacts are missing first names.
**Why it matters:**
* Prevents awkward blanks like “Hi ,”
* Keeps broadcasts and other messages clean when data varies across recipients
**How to set a fallback**
1. Insert a tag via the **#** icon.
2. Click on the tag to add a **Fallback** value for that tag (e.g., “there” for first names).
3. Save or send.
Fallbacks work for **custom field tags** too. Set a fallback on any custom field tag so messages stay readable when a contact doesn't have that value filled in.
**Example with fallbacks**
* Message: `Hi {{ ContactFirstName }}!`
* With data: **“Hi Alex!”**
* Without data (fallback “there”): **“Hi there!”**
### Available tags
**Contact**
* `{{ ContactEmail }}` – contact’s email address
* `{{ ContactFirstName }}` – contact’s first name
* `{{ ContactLastName }}` – contact’s last name
* `{{ ContactPhone }}` – contact’s phone number
**Your user profile**
* `{{ UserEmail }}` – your MessageDesk user email
* `{{ UserFirstName }}` – your first name
* `{{ UserLastName }}` – your last name
* `{{ UserPhone }}` – your personal phone number saved in your user profile
**Workspace**
* `{{ WorkspaceName }}` – your MessageDesk workspace name
* `{{ WorkspaceEmail }}` – your workspace’s primary email
* `{{ WorkspacePhone }}` – your workspace’s primary phone
**Custom fields**
Every [custom field](/settings/workspace-settings/custom-fields) on a contact is also available as a personalization tag (for example, `{{ Region }}`, `{{ AccountType }}`, `{{ RenewalMonth }}`). Custom field tags show up in the `#` menu alongside the built-in tags.
* Tags update automatically when you add, rename, or delete a custom field in **Workspace Settings → Custom Fields**.
* Set a [fallback](#set-a-tag-fallback-important) so the message still reads cleanly when a contact is missing a value.
**Note:** Tags resolve at send time. In broadcasts, each recipient gets their own personalized version.
***
## Set a tag fallback (important)
A fallback is the default text used **when a tag has no data**. For example, when you text a raw phone number that isn't saved as a contact yet, or when some contacts are missing first names.
**Why it matters:**
* Prevents awkward blanks like “Hi ,”
* Keeps broadcasts and other messages clean when data varies across recipients
**How to set a fallback**
1. Insert a tag via the **#** icon.
2. Click on the tag to add a **Fallback** value for that tag (e.g., “there” for first names).
3. Save or send.
Fallbacks work for **custom field tags** too. Set a fallback on any custom field tag so messages stay readable when a contact doesn't have that value filled in.
**Example with fallbacks**
* Message: `Hi {{ ContactFirstName }}!`
* With data: **“Hi Alex!”**
* Without data (fallback “there”): **“Hi there!”**
 Note: tags without a fallback set will appear as red when inserted into a message. A tag with a fallback set will appear in light purple.
 ## Template and tag tips and best practices
* **Use short, specific templates.** Create separate versions for common scenarios (24h reminder vs day-of).
* **Personalize the first line.** Use `{{ ContactFirstName }}` with a fallback like “there.”
* **Combine with scheduling.** Queue reminders and follow-ups during business hours.
* **Keep compliance in mind.** For non-conversational or promotional sends, include opt-out language (e.g., “Reply STOP to opt out”).
* **Review periodically.** Archive low-performers and refine wording based on replies.
***
## Frequently asked template and tag questions
You can use the **preset tags** listed above plus any **custom field** you've created on a contact.
Yes. Every custom field on a contact is available as a personalization tag in the `#` menu (for example, `{{ Region }}` or `{{ AccountType }}`). Set a **fallback** so the message still reads cleanly when a contact is missing that value. Manage your fields in [**Custom Fields settings**](/settings/workspace-settings/custom-fields).
Anywhere you compose a message: 1-on-1, broadcasts, group SMS (tags personalize per recipient), and templates.
Yes. Templates can include **media (MMS)**, **emoji**, and **tags**.
## Troubleshooting
* **My tag didn’t resolve.**\
Check that the contact has data for that field and that you set a **fallback**. Make sure the braces and tag name are correct (e.g., `{{ ContactFirstName }}`).
* **I can’t find a template.**\
Try a simpler search or confirm the template name in **Workspace Settings → Inbox Settings → Templates**.
* **A template needs updating for everyone.**\
Edit it from the **TT** menu (pencil icon) or from **Workspace Settings** so the change applies to all users.
## Template and tag tips and best practices
* **Use short, specific templates.** Create separate versions for common scenarios (24h reminder vs day-of).
* **Personalize the first line.** Use `{{ ContactFirstName }}` with a fallback like “there.”
* **Combine with scheduling.** Queue reminders and follow-ups during business hours.
* **Keep compliance in mind.** For non-conversational or promotional sends, include opt-out language (e.g., “Reply STOP to opt out”).
* **Review periodically.** Archive low-performers and refine wording based on replies.
***
## Frequently asked template and tag questions
You can use the **preset tags** listed above plus any **custom field** you've created on a contact.
Yes. Every custom field on a contact is available as a personalization tag in the `#` menu (for example, `{{ Region }}` or `{{ AccountType }}`). Set a **fallback** so the message still reads cleanly when a contact is missing that value. Manage your fields in [**Custom Fields settings**](/settings/workspace-settings/custom-fields).
Anywhere you compose a message: 1-on-1, broadcasts, group SMS (tags personalize per recipient), and templates.
Yes. Templates can include **media (MMS)**, **emoji**, and **tags**.
## Troubleshooting
* **My tag didn’t resolve.**\
Check that the contact has data for that field and that you set a **fallback**. Make sure the braces and tag name are correct (e.g., `{{ ContactFirstName }}`).
* **I can’t find a template.**\
Try a simpler search or confirm the template name in **Workspace Settings → Inbox Settings → Templates**.
* **A template needs updating for everyone.**\
Edit it from the **TT** menu (pencil icon) or from **Workspace Settings** so the change applies to all users.