How to create, edit, and delete Relays
Build reliable Relays with a clear flow: Trigger → Conditions → Actions. This guide shows you how to configure, test, and troubleshoot Relays.Permissions required: By default, only Admin users can access Relays. If you don’t see the Relays module, ask your workspace admin to grant you Relay Management permissions via Settings → Team Management. Learn more: Team Management.
How to create or edit a Relay
1. Visit the Relays module
When you first visit Relays, you’ll see templates you can use as a starting point, just click Add Relay to start building.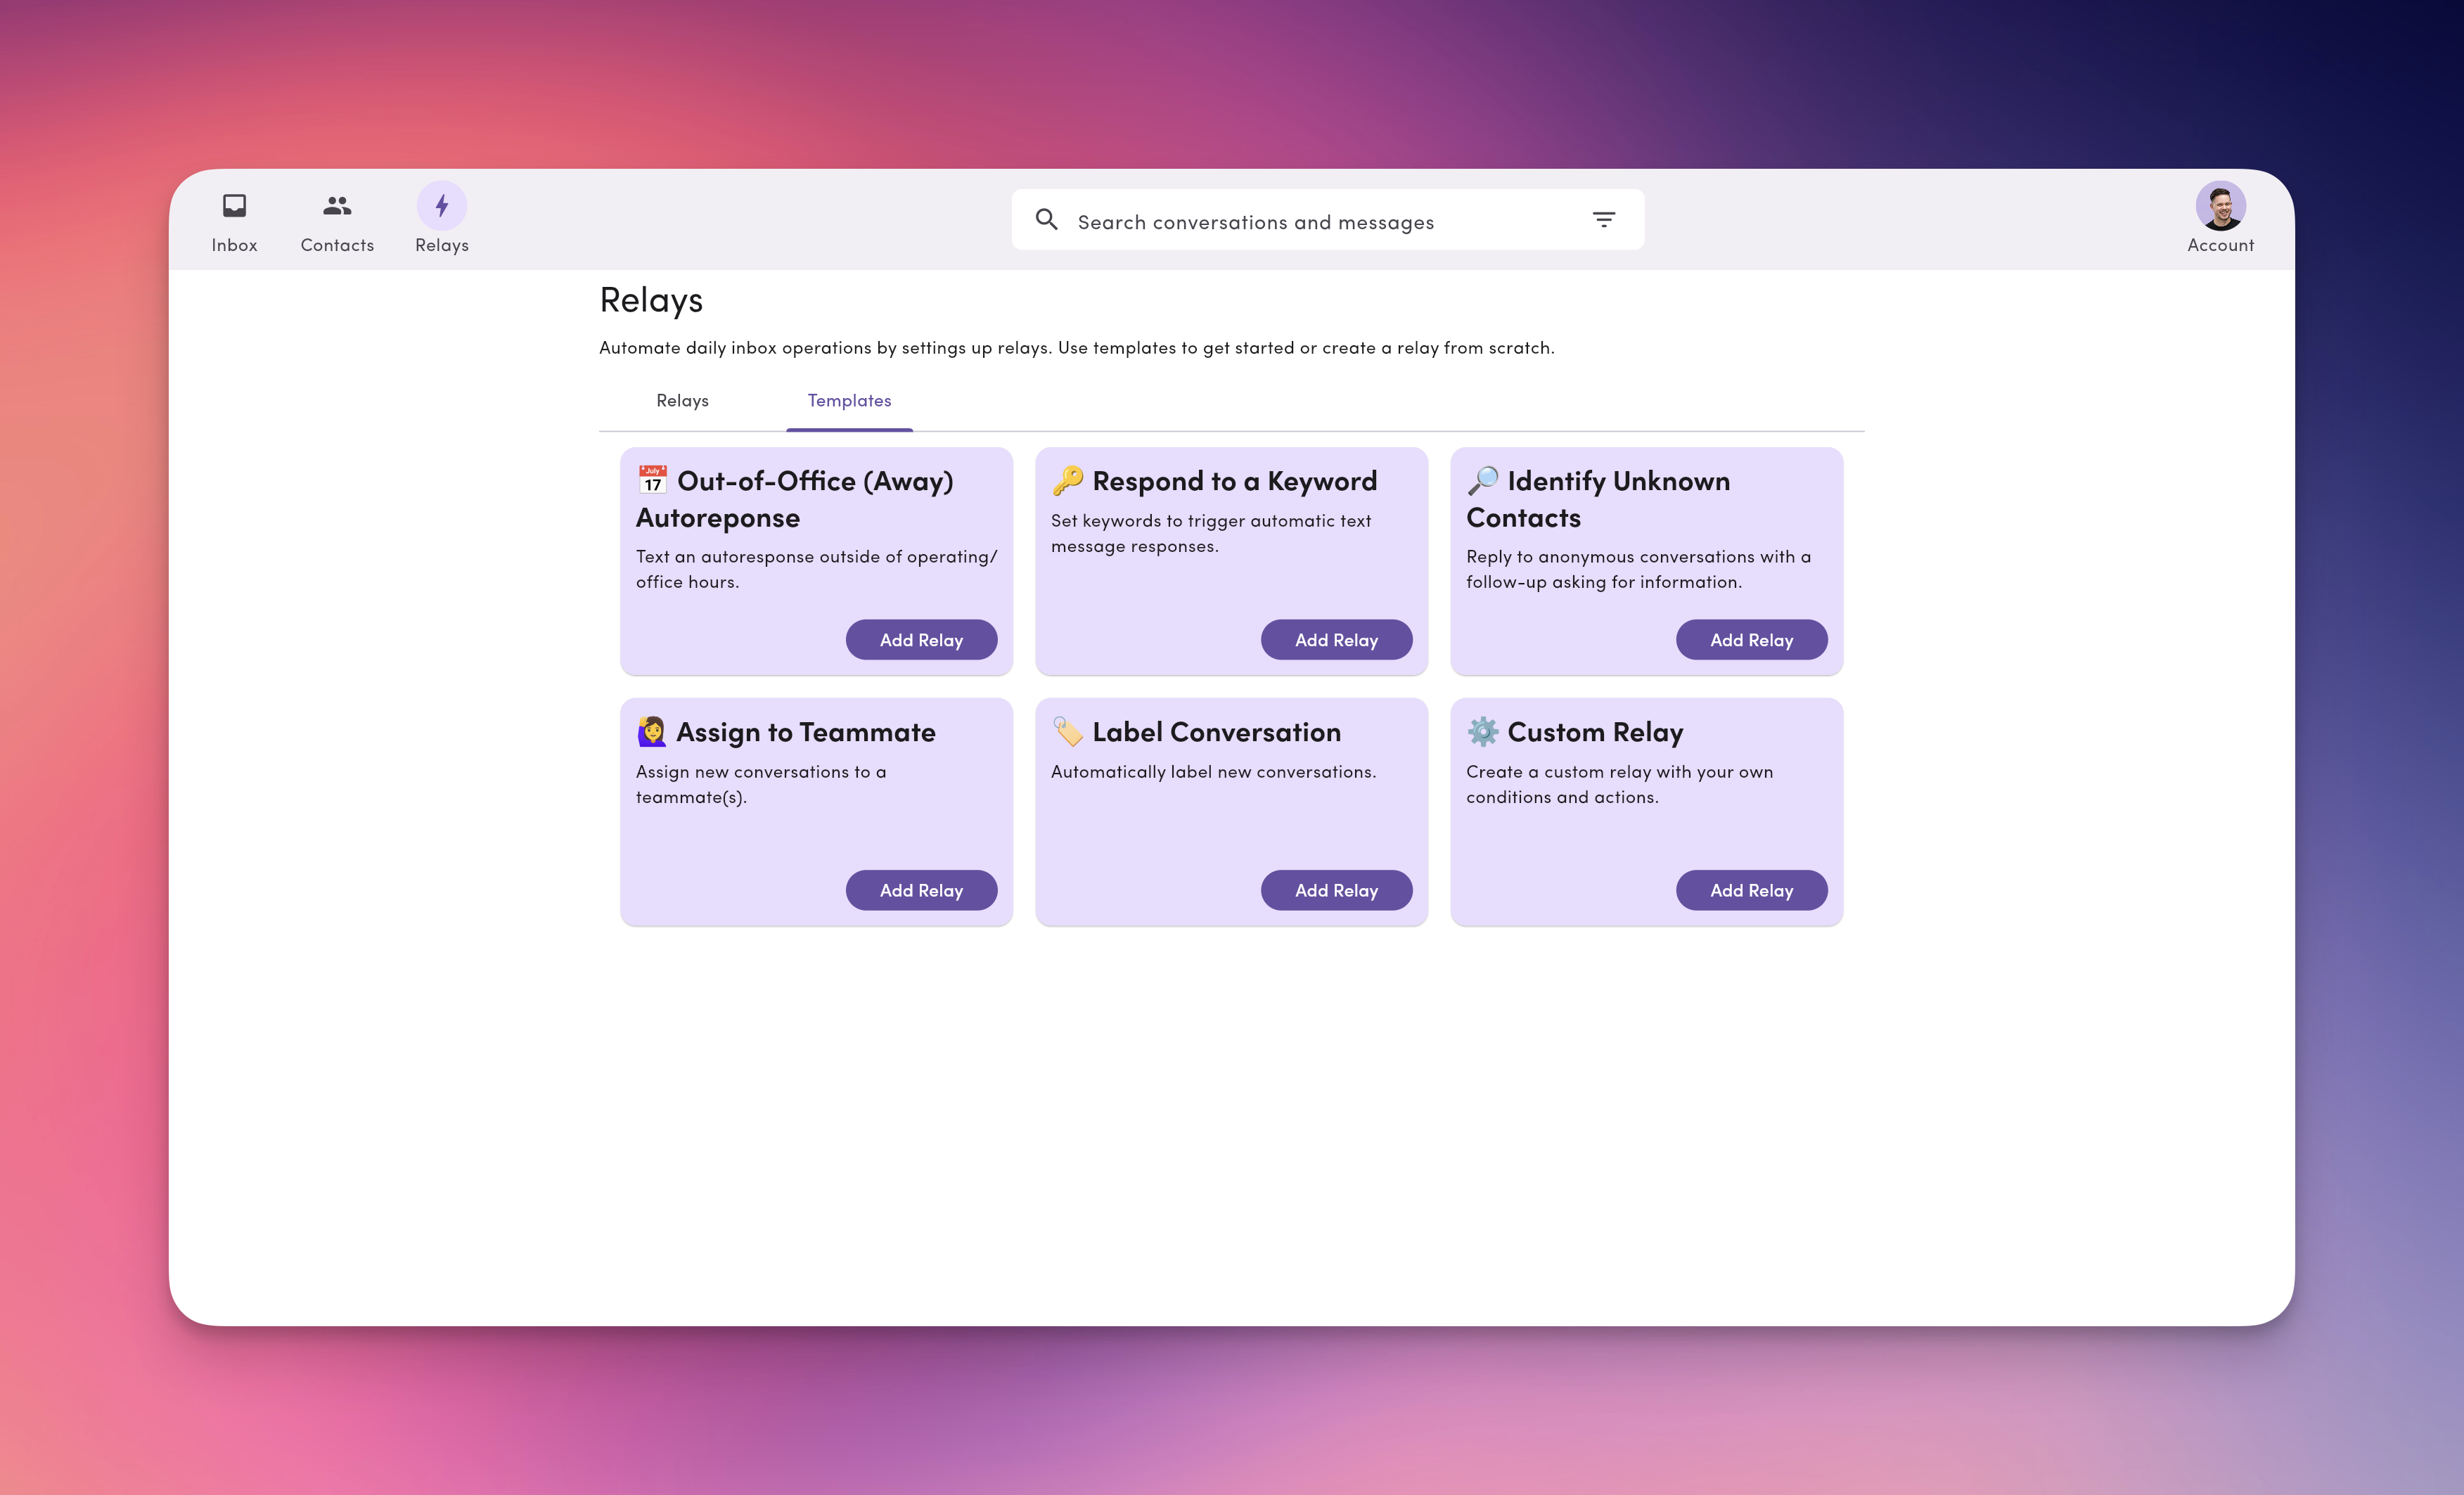
By default, new Relays are paused. Toggle them On when you’re ready.
2. Name and describe your Relay
Click the vertical ⋯ (three dots) next to a Relay to Rename, Edit description, or Delete.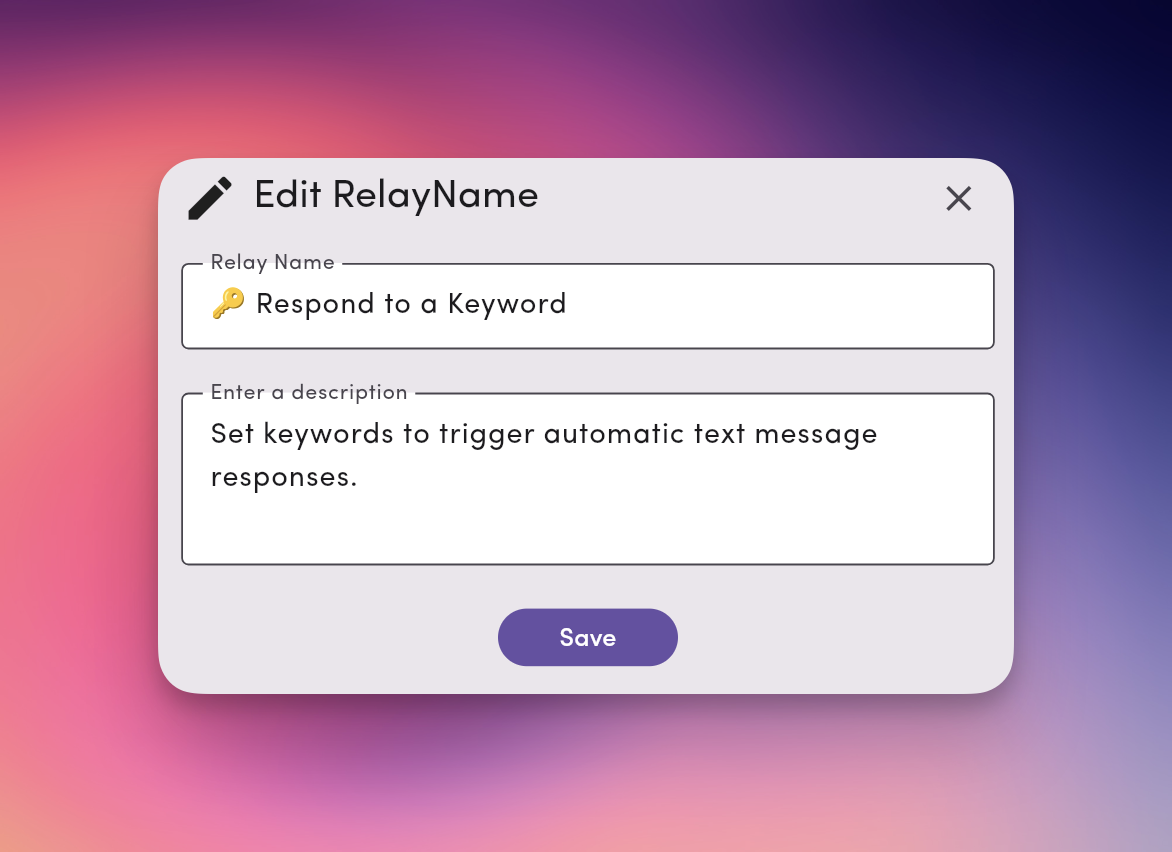
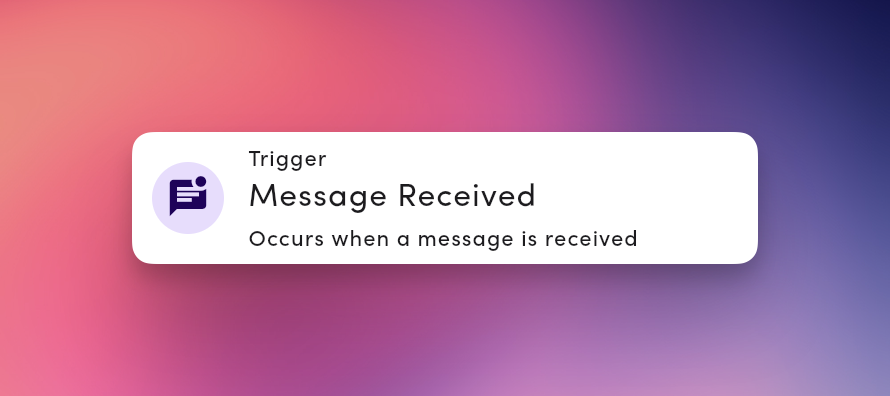
3. Set a Trigger
Current supported trigger: Message Received (fires when a new inbound SMS arrives).Note: Templates include the message received trigger by default.
4. Add Conditions
Conditions control where/when a Relay runs. You can combine multiple conditions with AND or OR. Available conditions:- Message contains text: match keywords like
SUPPORT,HELP - My phone number equals: run only on a specific outbound line
- Is anonymous conversation: no saved contact yet
- Is new conversation: first inbound in a thread
- Active hours: restrict to a daily time window

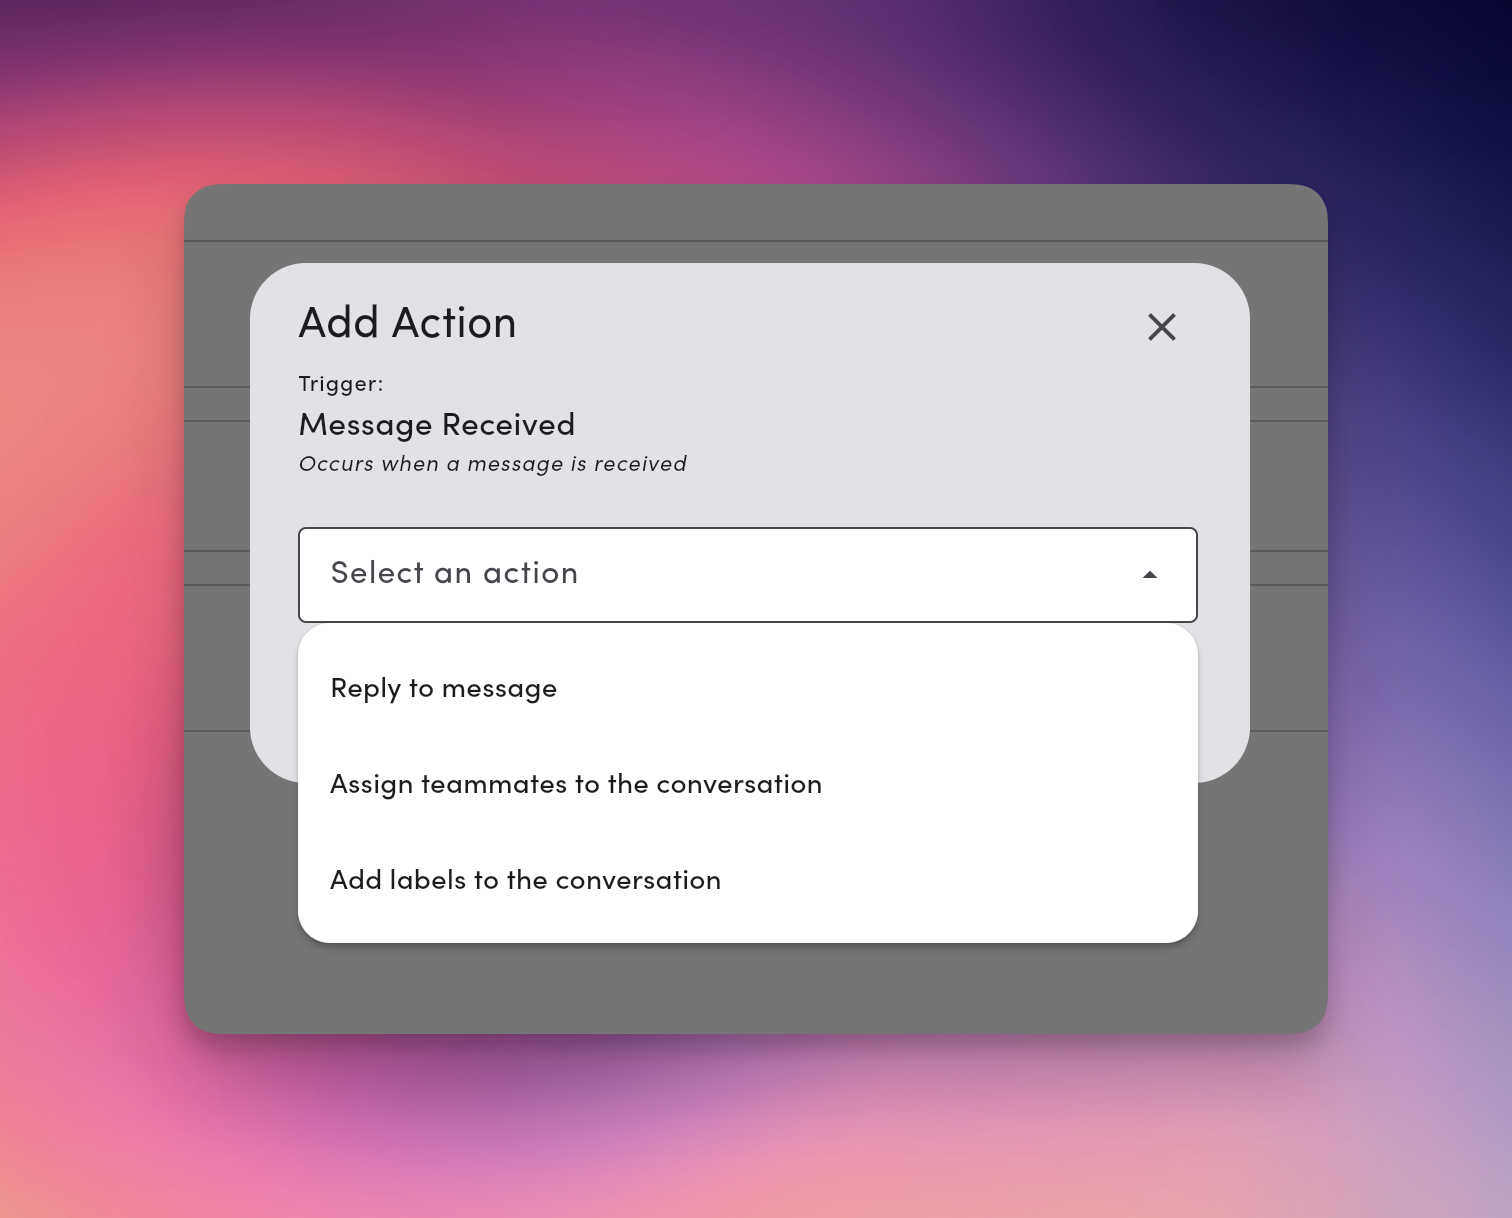
5. Add Actions
Actions run when the conditions match. You can add one or many in the order you want them to execute.- Reply to message: send an SMS/MMS (supports templates, tags, and media)
- Assign teammates to the conversation: pick one or more users
- Add labels to the conversation: apply one or more labels
- Remove labels from the conversation: remove one or more labels
- Remove teammates from the conversation: remove one or more assigned users
- Send webhook: send event data to your webhook endpoint
- Add a Delay to Reply to message to wait minutes/hours before sending.
- Delays help prevent duplicate auto-replies if a message was sent recently.
6. Activate your Relay
Use the toggle to turn the Relay On. You can pause anytime without losing your setup.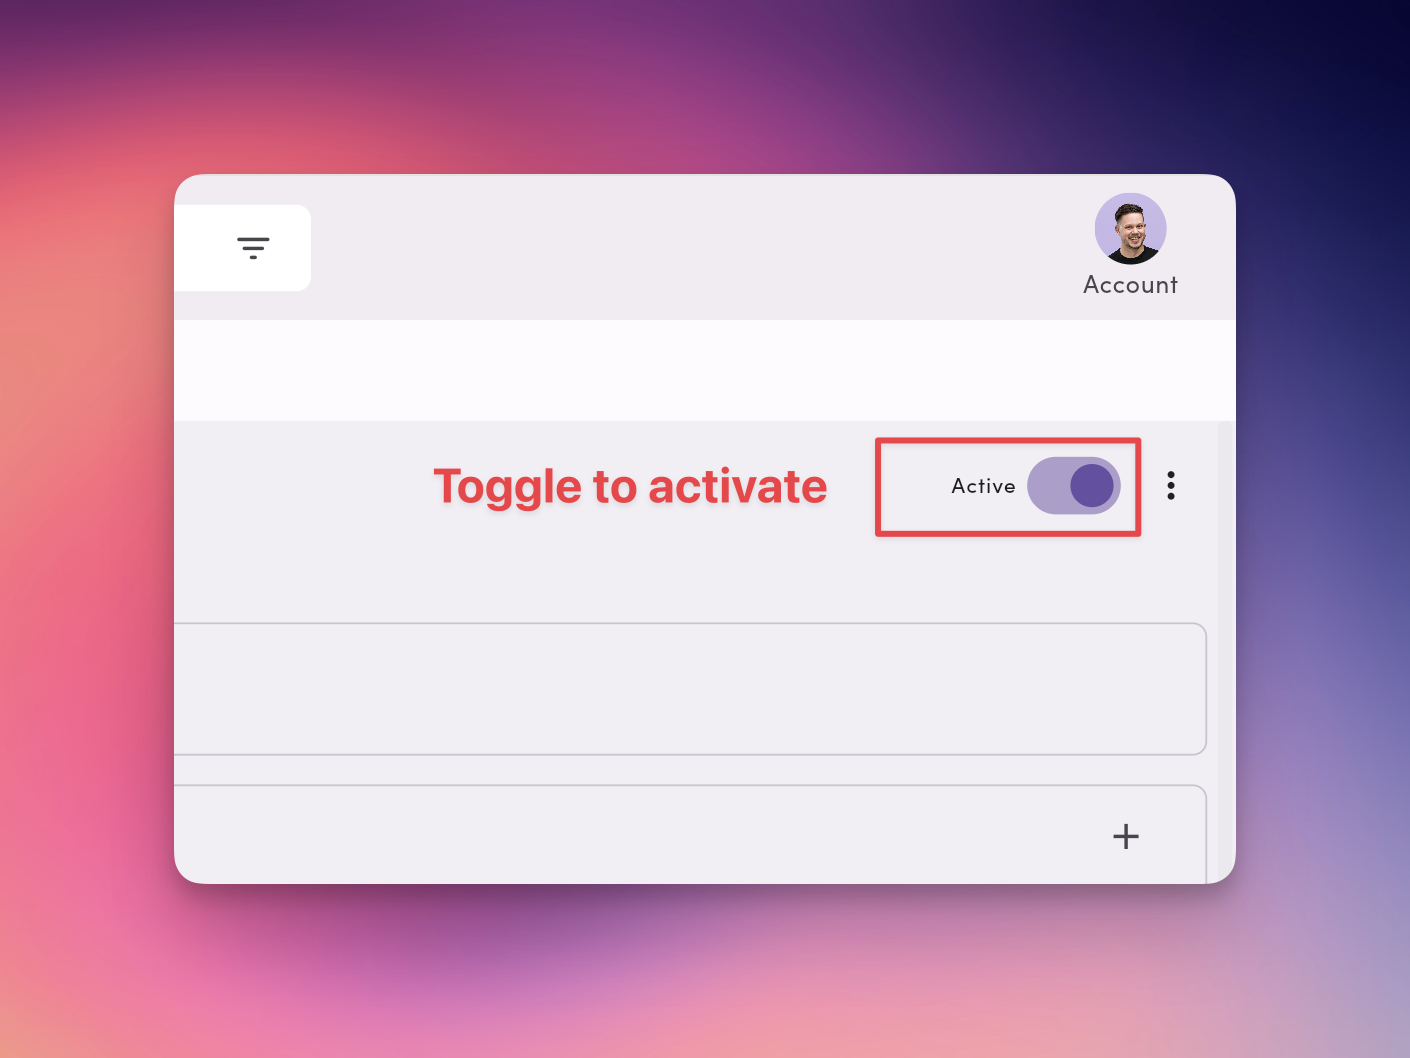
Managing Relays
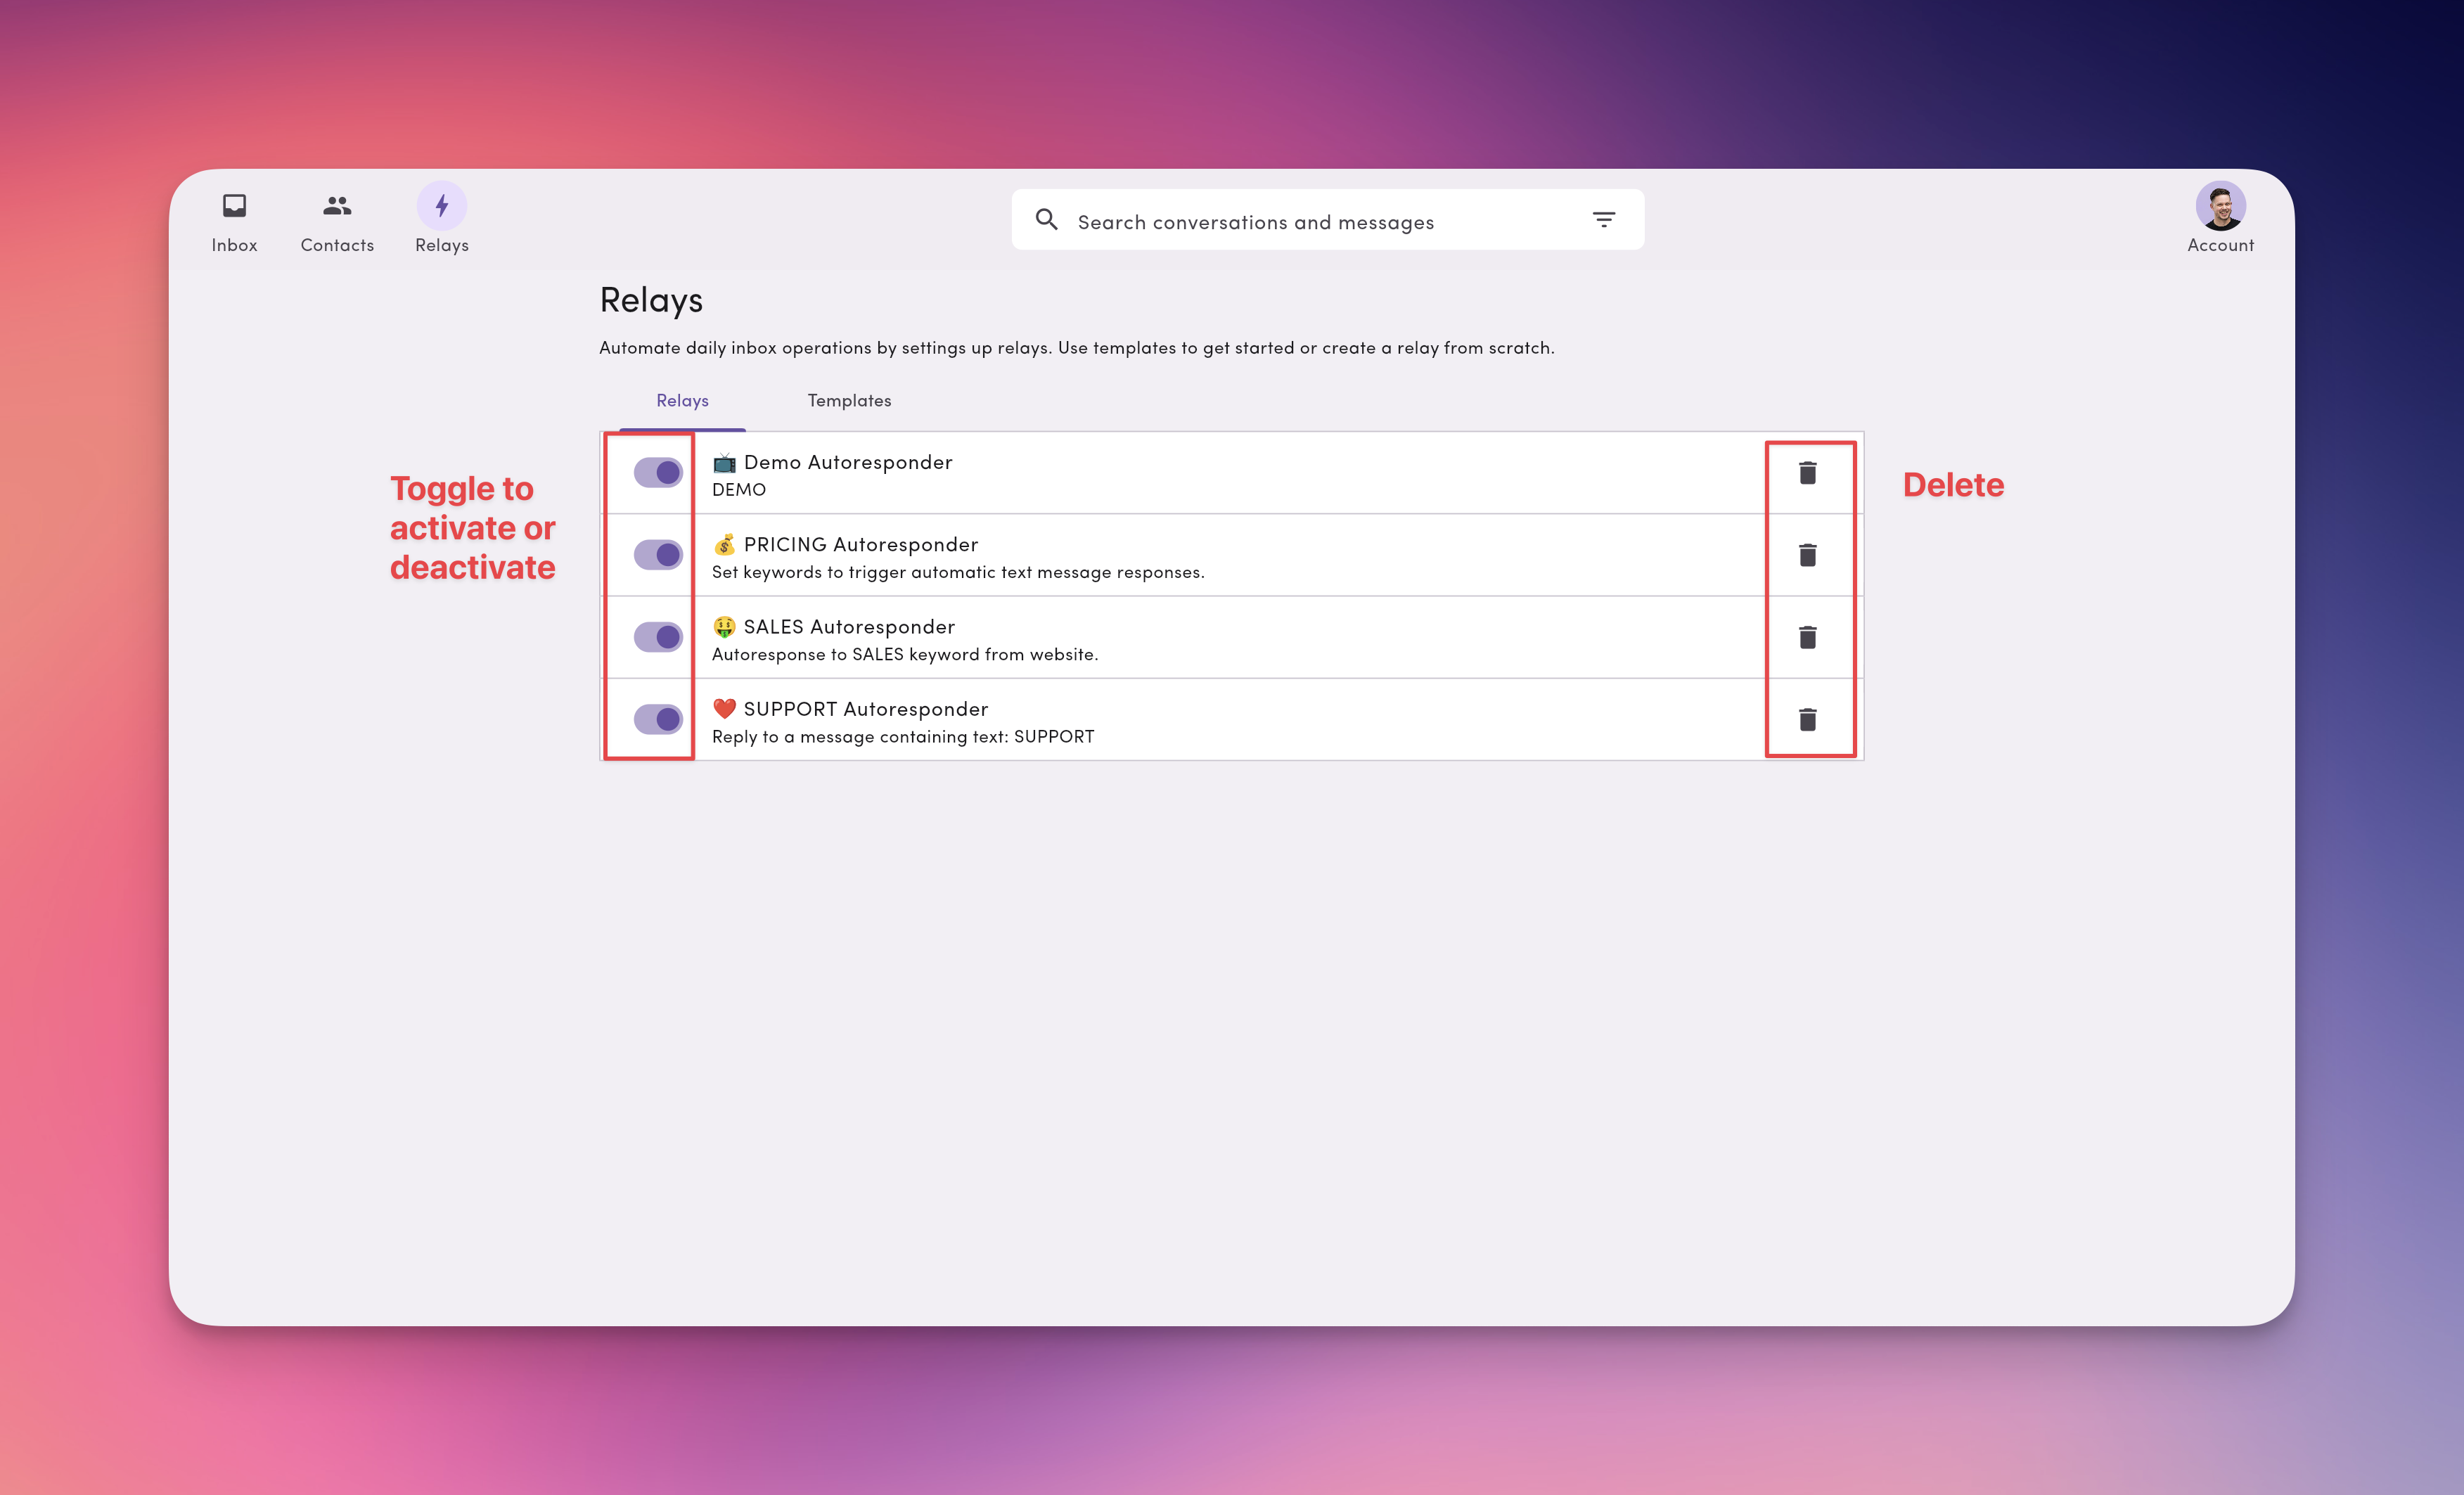
Pause / resume
- From the list: toggle On/Off
- From details: use the status toggle at the top
Delete
Open the Relay → ⋯ → Delete.Starter Relay templates (copy and adapt)
Example 1: Delegation and team routing Relay
Use this setup when multiple teammates need to view and reply on behalf of a manager.
Triggers | Conditions | Actions x2 |
|---|---|---|
Message Received | On the Manager’s or Teammates’ phone line | Assign Manager 1, Teammate 2, and Teammate 3 |
Apply labels “Region 1” and “Region 2” |
When a message comes in on the manager’s number, MessageDesk automatically assigns the conversation to the manager and the two direct reports. The Relay also labels the message by region, keeping everything organized by team and location.
Relays and conversation status
When a Relay sends an outbound message, MessageDesk updates the conversation’s status the same way it would for a teammate’s reply. This applies to after-hours auto-replies, out-of-office replies, and any other Relay action that sends a message.| Event | Resulting status |
|---|---|
| Inbound message arrives | Unread |
| Relay sends an auto-reply | Replied |
| A teammate opens the conversation in the Inbox | Read |
| A teammate closes the conversation | Closed |
Auto-replies don’t mark a conversation as Read. A Relay reply moves the conversation out of the Unread filter and into Replied. The conversation is only marked Read when a teammate opens it. After-hours threads still surface for human review the next morning, even though the customer already got an automated acknowledgement.
Example 2: Out-of-office and weekend autoresponder
Use this when teammates want to automatically reply during vacations or after hours.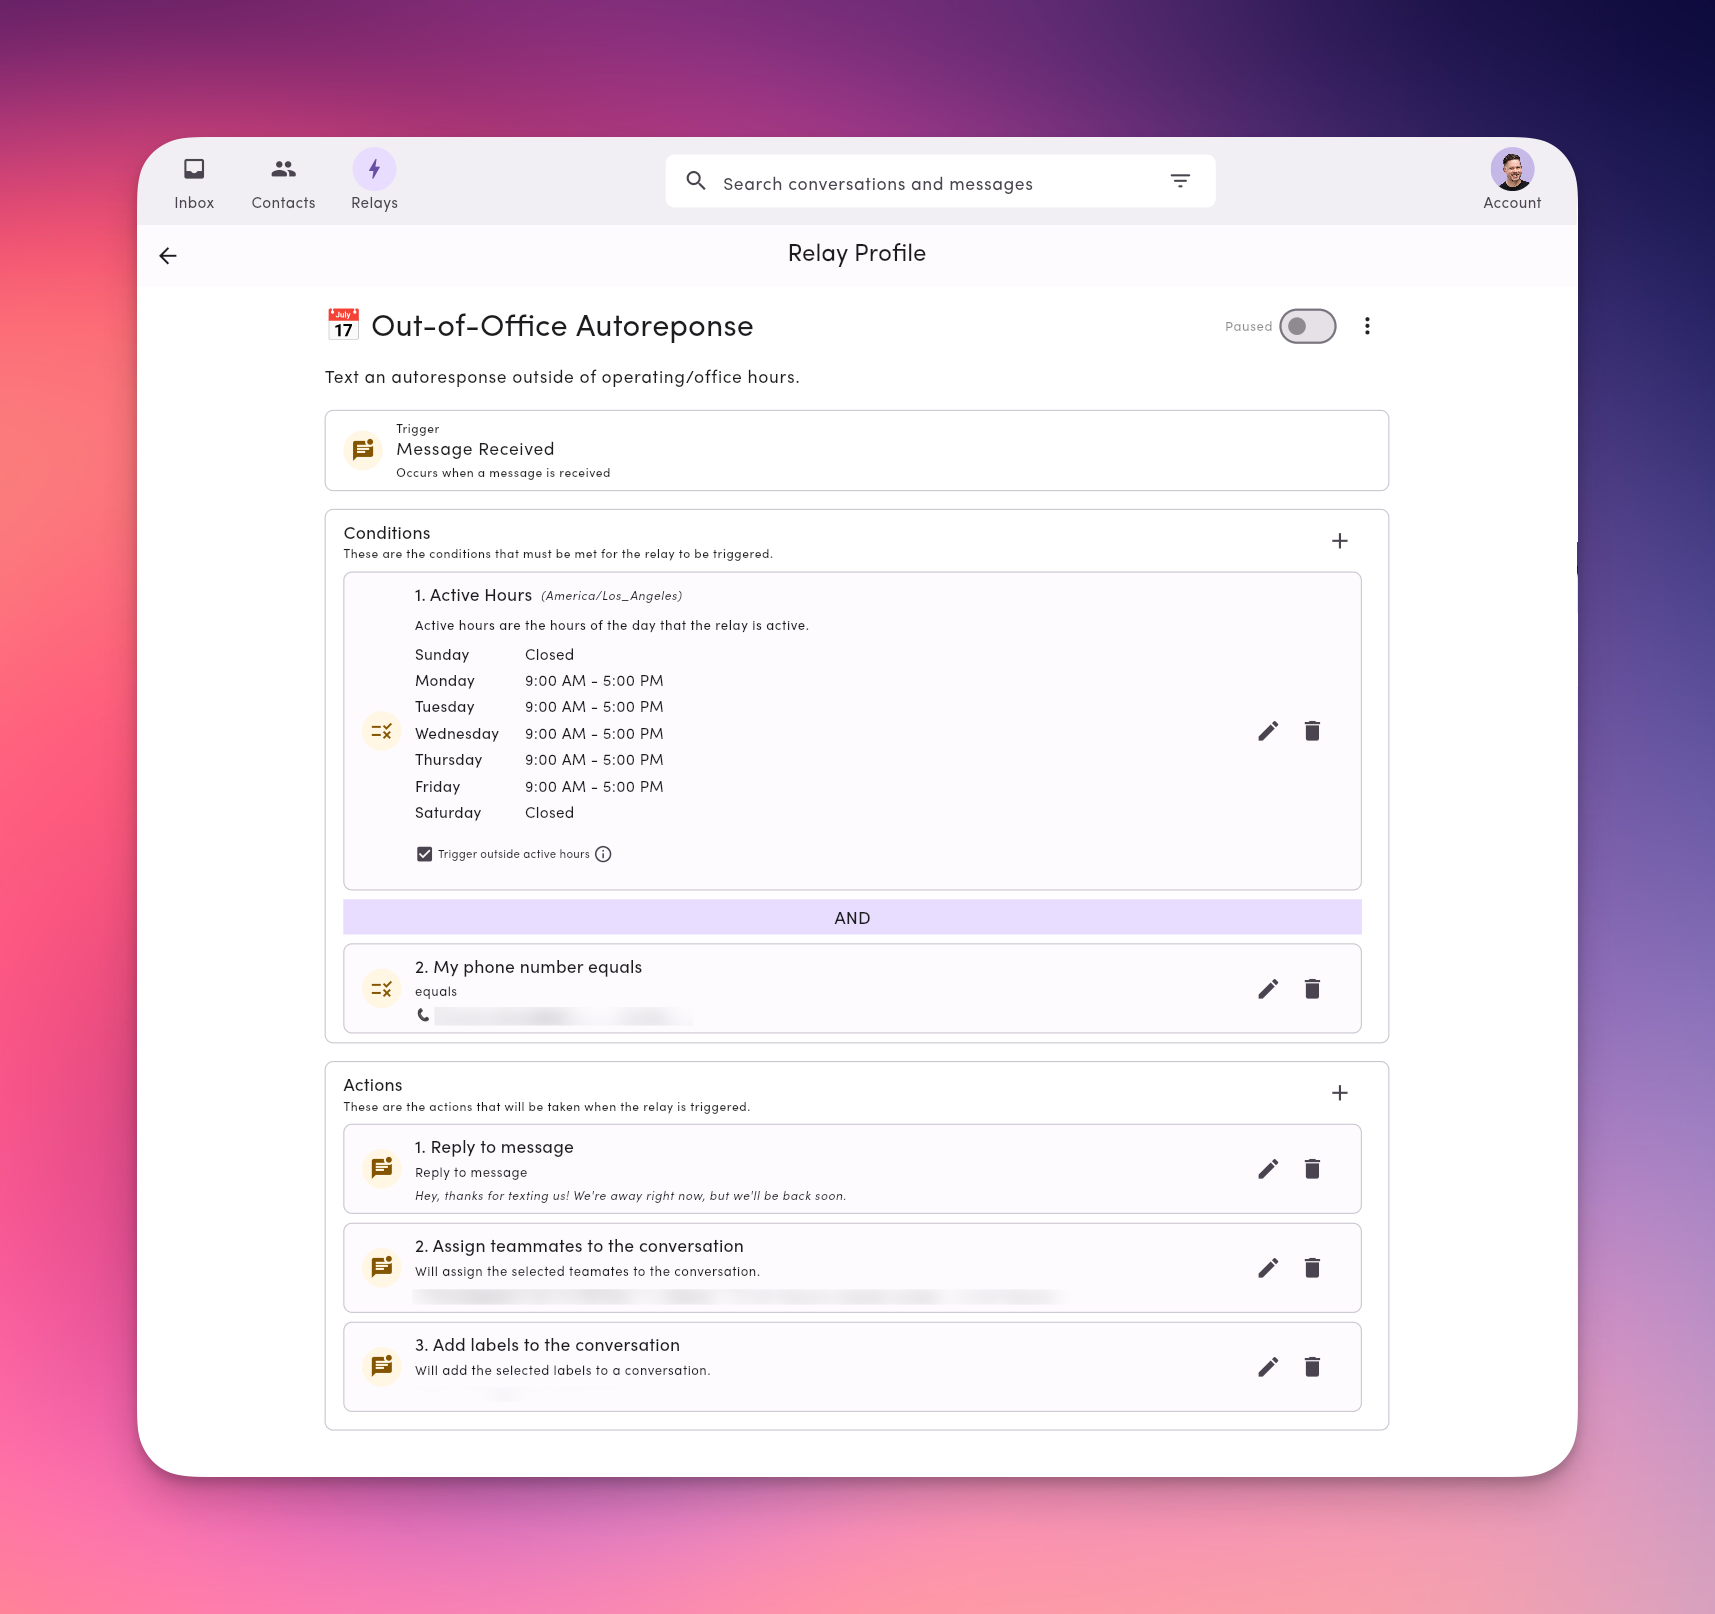
Triggers | Conditions x2 | Actions x3 |
|---|---|---|
Message Received | Active hours | Send Auto Reply: “Thanks for reaching out! I’m currently out of the office. Please text [alternate number].” |
My phone number is | Assign to teammates: Teammate 1, 2, and 3 | |
Add labels to the conversation: Region 1, Region 2 |
- Create a new Relay and choose Message Received as the trigger.
- Under conditions, set Active Hours for each day to “Closed” or a select time span.
- Toggle “Trigger outside of active hours” ON.
- Add an Action → Send Auto Reply and compose your message.
- Add an Action → Assign to teammates and select teammates.
- Add an Action → Add labels to the conversation and select labels.
- Toggle the Relay ON.
Example 3: Identify unknown contacts/conversations
Use this Relay to automatically collect names from new, anonymous conversations.Perfect for teams who receive texts from unsaved numbers or new contacts.

| Trigger | Condition | Actions |
|---|---|---|
| Message Received | Conversation is anonymous (contact not in directory) | Send Auto Reply: “Thanks for texting us! What’s your first and last name so we know who to help?” |
- Create a new Relay and choose Message Received as the trigger.
- Under conditions, set My phone number equals to a connected phone line.
- Set another condition for Is anonymous conversation.
- Add an Action → Reply to message and compose your message.
- Add an Action → Assign to teammates and select teammates.
- Add an Action → Add labels to the conversation and select labels.
- Toggle the Relay ON.
Example 4: Keyword-based autoresponder
Use this Relay to automatically respond when someone texts in a specific keyword, like SUPPORT, JOIN, or BOOK. When a contact sends a message containing the word “SUPPORT,” MessageDesk automatically replies with your chosen message. It’s ideal for auto-routing messages or triggering fast replies without manual effort.
| Trigger | Condition | Actions |
|---|---|---|
| Message Received | Message contains keyword “SUPPORT” | Send Auto Reply: “Thanks for reaching out to support. Please share any extra details, and we’ll jump in.” |
- Create a new Relay and choose Message Received as the trigger.
- Under conditions, set My phone number equals to a connected phone line.
- Set another condition for Message contains text SUPPORT.
- Add an Action → Reply to message and compose your message.
- Add an Action → Assign to teammates and select teammates.
- Add an Action → Add labels to the conversation and select labels.
- Toggle the Relay ON.
Relays best practices
- Start simple. Test one Relay before scaling across teams.
- Name clearly. Use descriptive titles like
Teammate 1 - Delegation RelayorRegion X,Y, Z Autoresponder. - Test with your phone. Send yourself a message to confirm behavior.
- Combine with templates. Use pre-saved templates to standardize replies.
- Audit regularly. Disable or update relays as team structure changes.
Technical notes and behavior
- Action order: Actions execute top-to-bottom in the order you add them.
- Delays: Units include minutes/hours. Use to prevent duplicate “fast follow” replies.
- Active hours: Configure daily windows; invert to run only outside business hours.
- Permissions aware: Assign/Label actions respect Roles & Permissions.
- Testing tip: Start with a single condition/action, confirm it fires, then layer on complexity.
Frequently asked Relay questions
Do Relays respect roles & permissions?Yes. Assign/Label actions follow your Roles & Permissions settings. Can multiple Relays run on one inbound message?
Yes. If conditions match for more than one Relay, each eligible Relay can run. Can I include media in auto-replies?
Yes. Keep each file ≤ 10 MB (files > 500 KB are sent as links). See Media. Can I pause without losing my setup?
Yes. Toggle Off to pause. Toggle On to resume. How do I avoid duplicate automated replies?
Add a Delay to the Reply action, or narrow conditions (e.g., “Is new conversation”). Does a Relay auto-reply mark the conversation as Read?
No. When a Relay sends an auto-reply, the conversation moves to Replied status (so it leaves the Unread filter), but it isn’t marked Read. A conversation is only marked Read when a teammate opens it in the Inbox. See Relays and conversation status.
Troubleshooting
A Relay didn’t fire- Confirm it’s On (not paused).
- Verify the Trigger is “Message Received”.
- Temporarily loosen Conditions (switch
ANDtoOR, remove a filter) to test.
- Add a Delay to your Reply action so back-to-back messages don’t both trigger an instant response.
- Check the target user/label permissions.
- Remove long Delays while testing to see results immediately.
- Review Active hours and the invert setting.
- Check your workspace timezone.